This page currently has outdated information and needs to be updated. The main changes are:
- Prusa i3 MK3S+ is now recommended.
- Creality CR-10 V2 is no longer used at UTDesign Makerspace.
¶ Introduction
To prepare a 3D model for printing, we recommend PrusaSlicer. PrusaSlicer is a free and open-source slicing software that can be used to slice for many different 3D printer models.
You can use other slicers like Cura, Simplify3D, etc. However, we will not give support for anything other than PrusaSlicer.
¶ Makerspace Computers
If you are logging into a Makerspace computer for the first time, a shortcut on your desktop should allow you to instantly apply PrusaSlicer profiles. However, if you have already launched PrusaSlicer, you will need to follow the steps below.
¶ Setup
To get your slicer set up to print with our various printers, you will need to start the Configuration Wizard in PrusaSlicer.
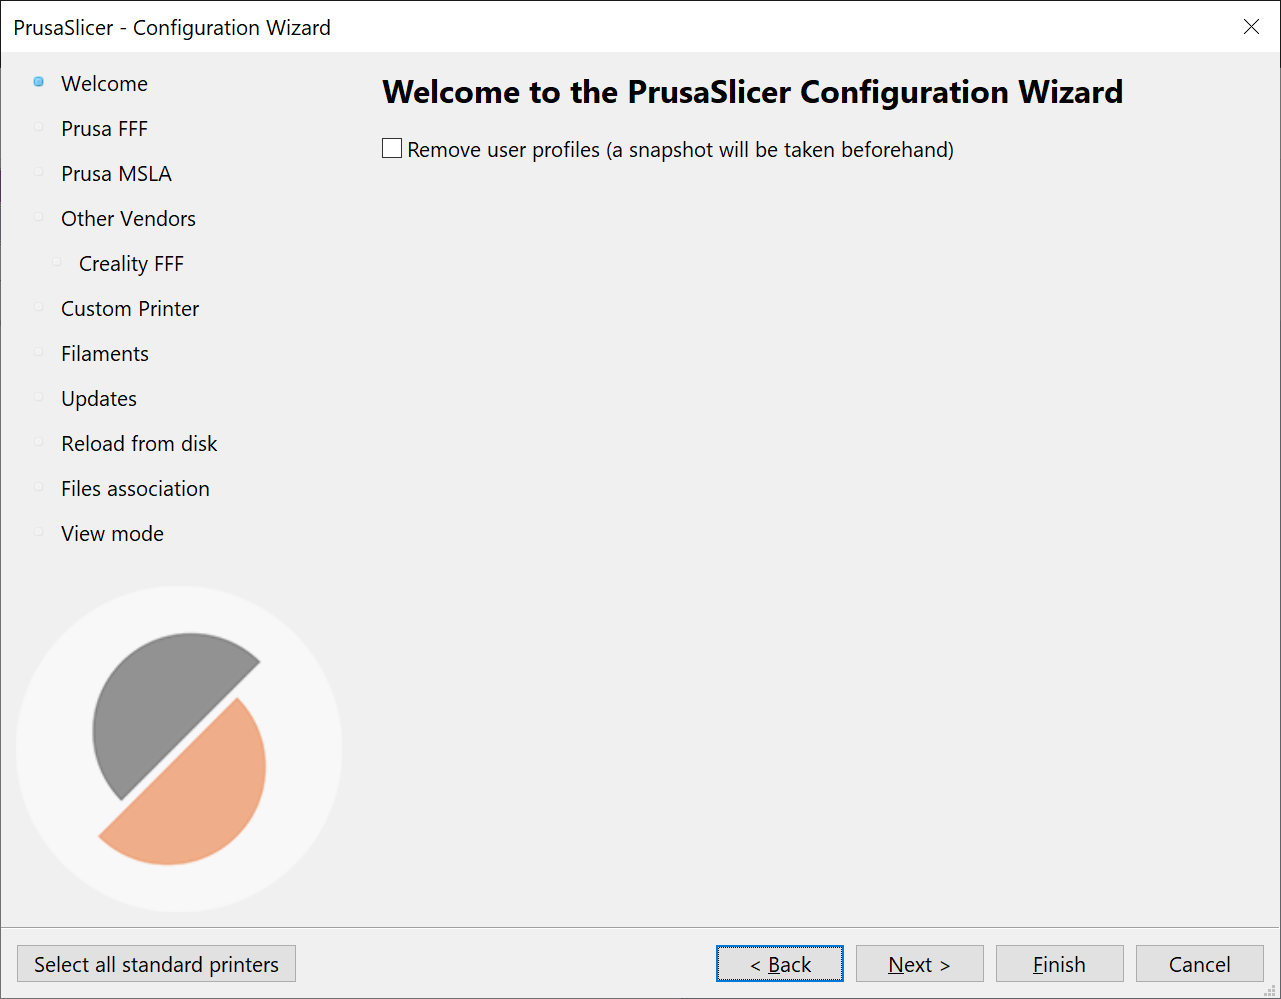
Click Next.
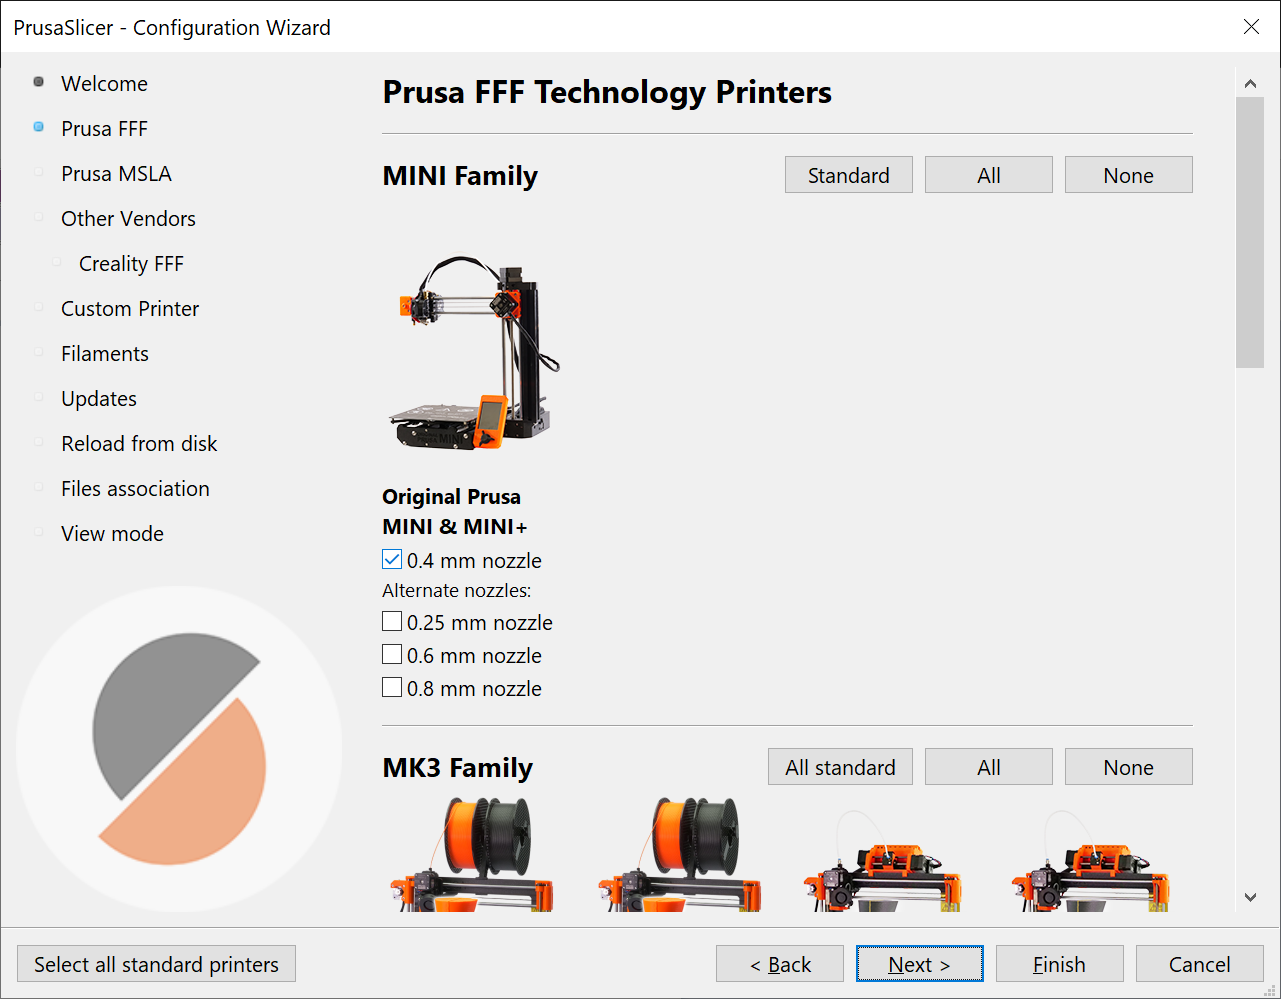
At this screen, you will add the Original Prusa MINI & MINI+. The stock configuration of the Prusa MINI+ is a 0.4mm nozzle, so that is the variant we will choose.
We will then click Next until we reach the Other Vendors screen.
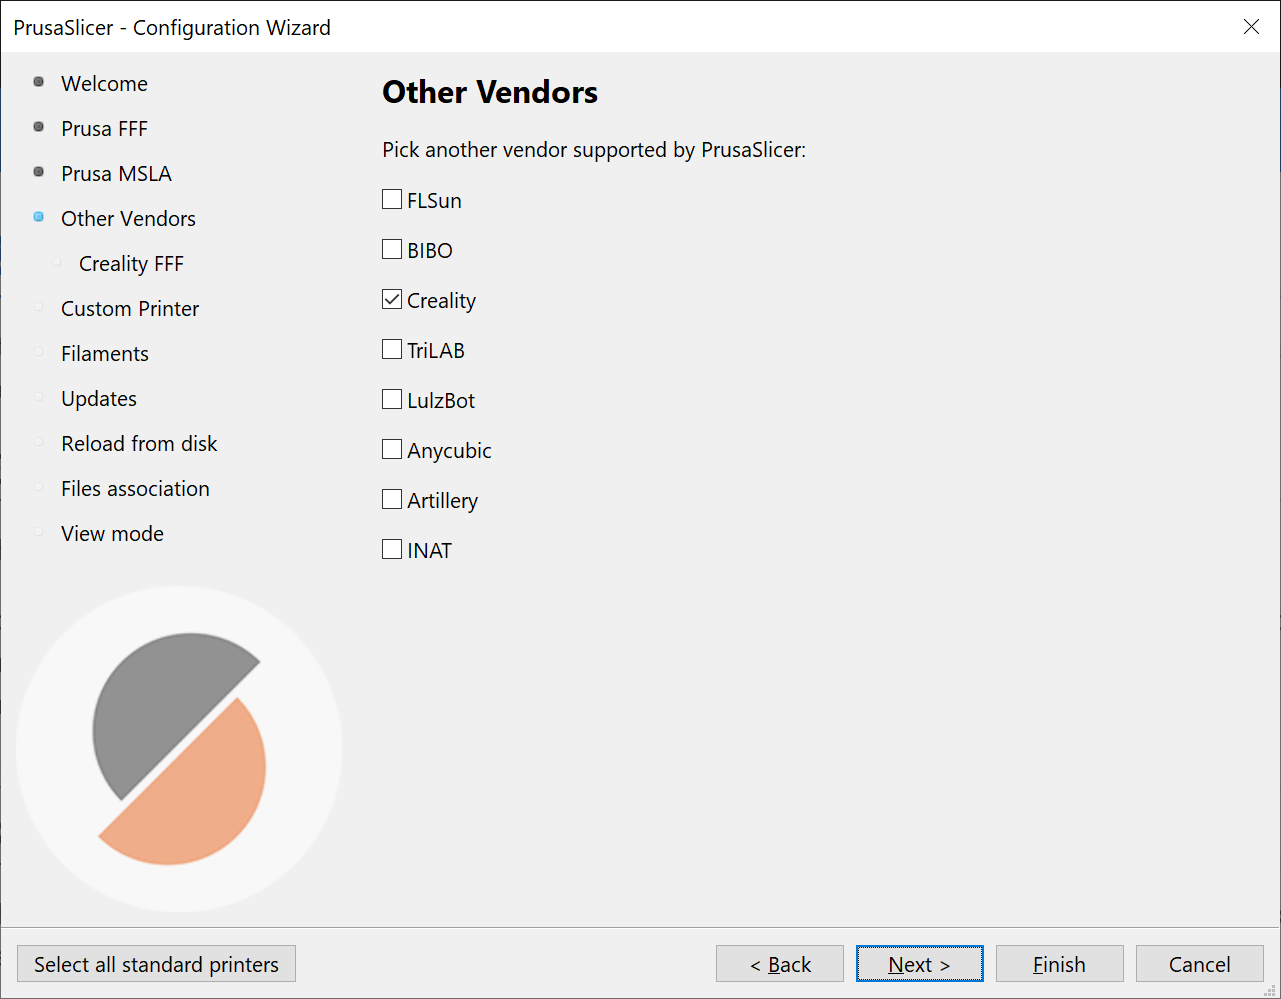
Here, we will specify that we want to add Creality printers. Creality is the manufacturer of the Ender-3 and CR-10 printers.
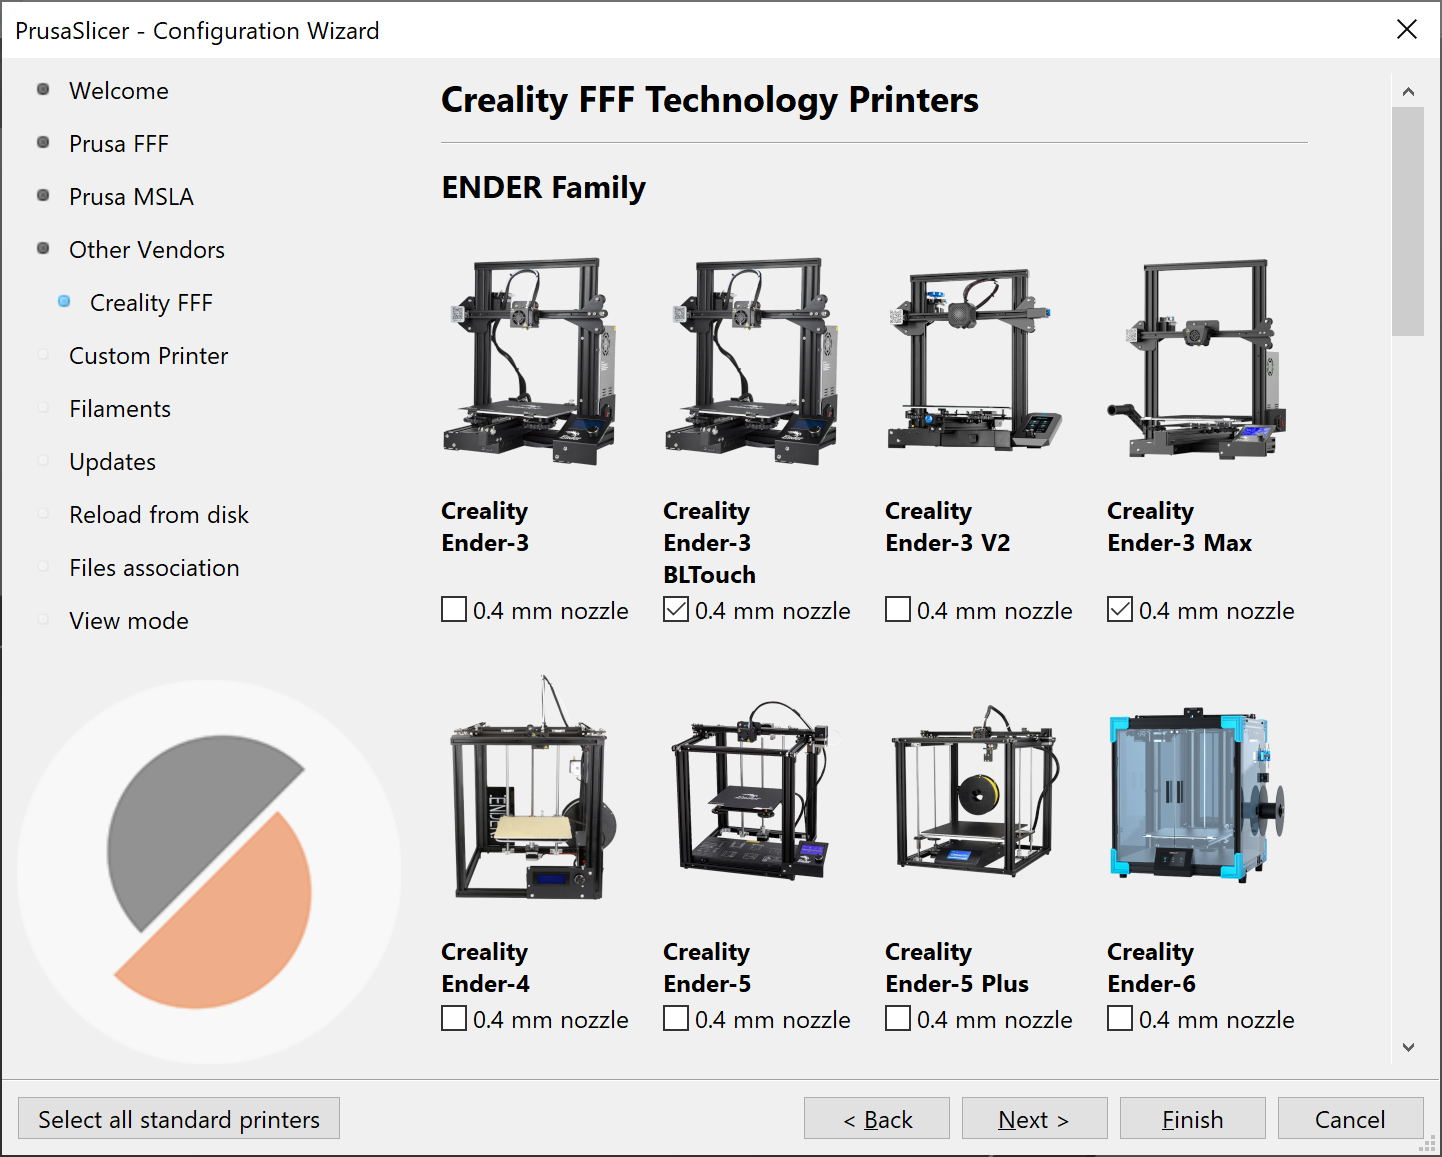
From the Ender family, we will choose the Creality Ender-3 BLTouch and Creality Ender-3 Max with the 0.4mm nozzle. Make sure to select the BLTouch variant of Ender-3 as it will automatically level the bed for you.
Not doing this will result in damage to the printer!
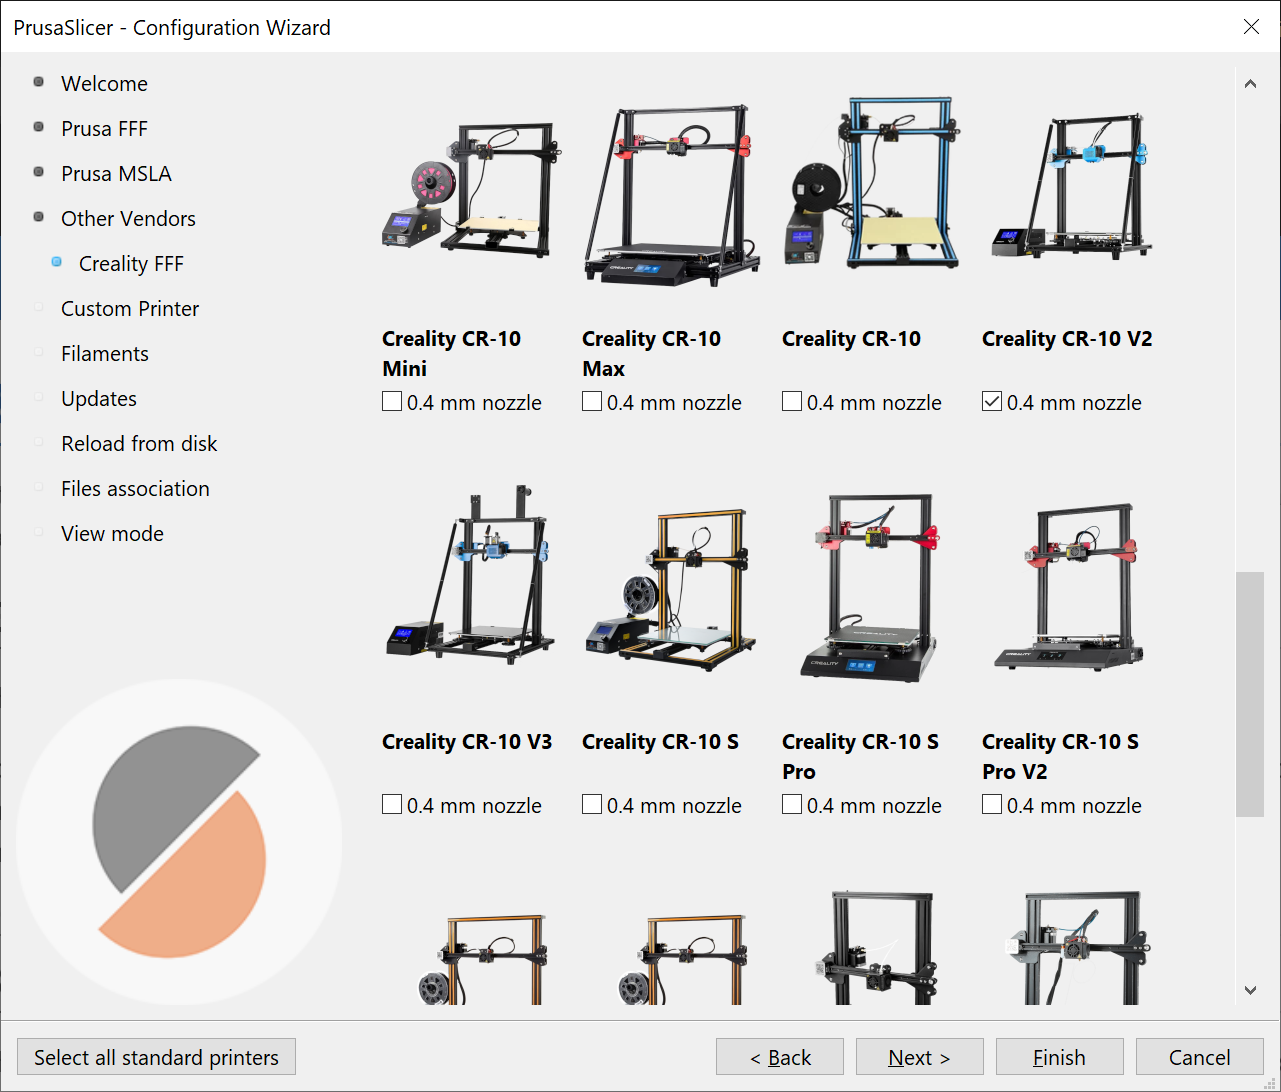
Then we will scroll down, find the Creality CR-10 V2, and add it.
From there, you can click Finish or click through the rest of the wizard using the Next button.
One last thing we need to do is change the settings of our Ender-3 Max and CR-10 V2 profile to use Auto Bed Leveling.
Not doing this will result in damage to the printer!
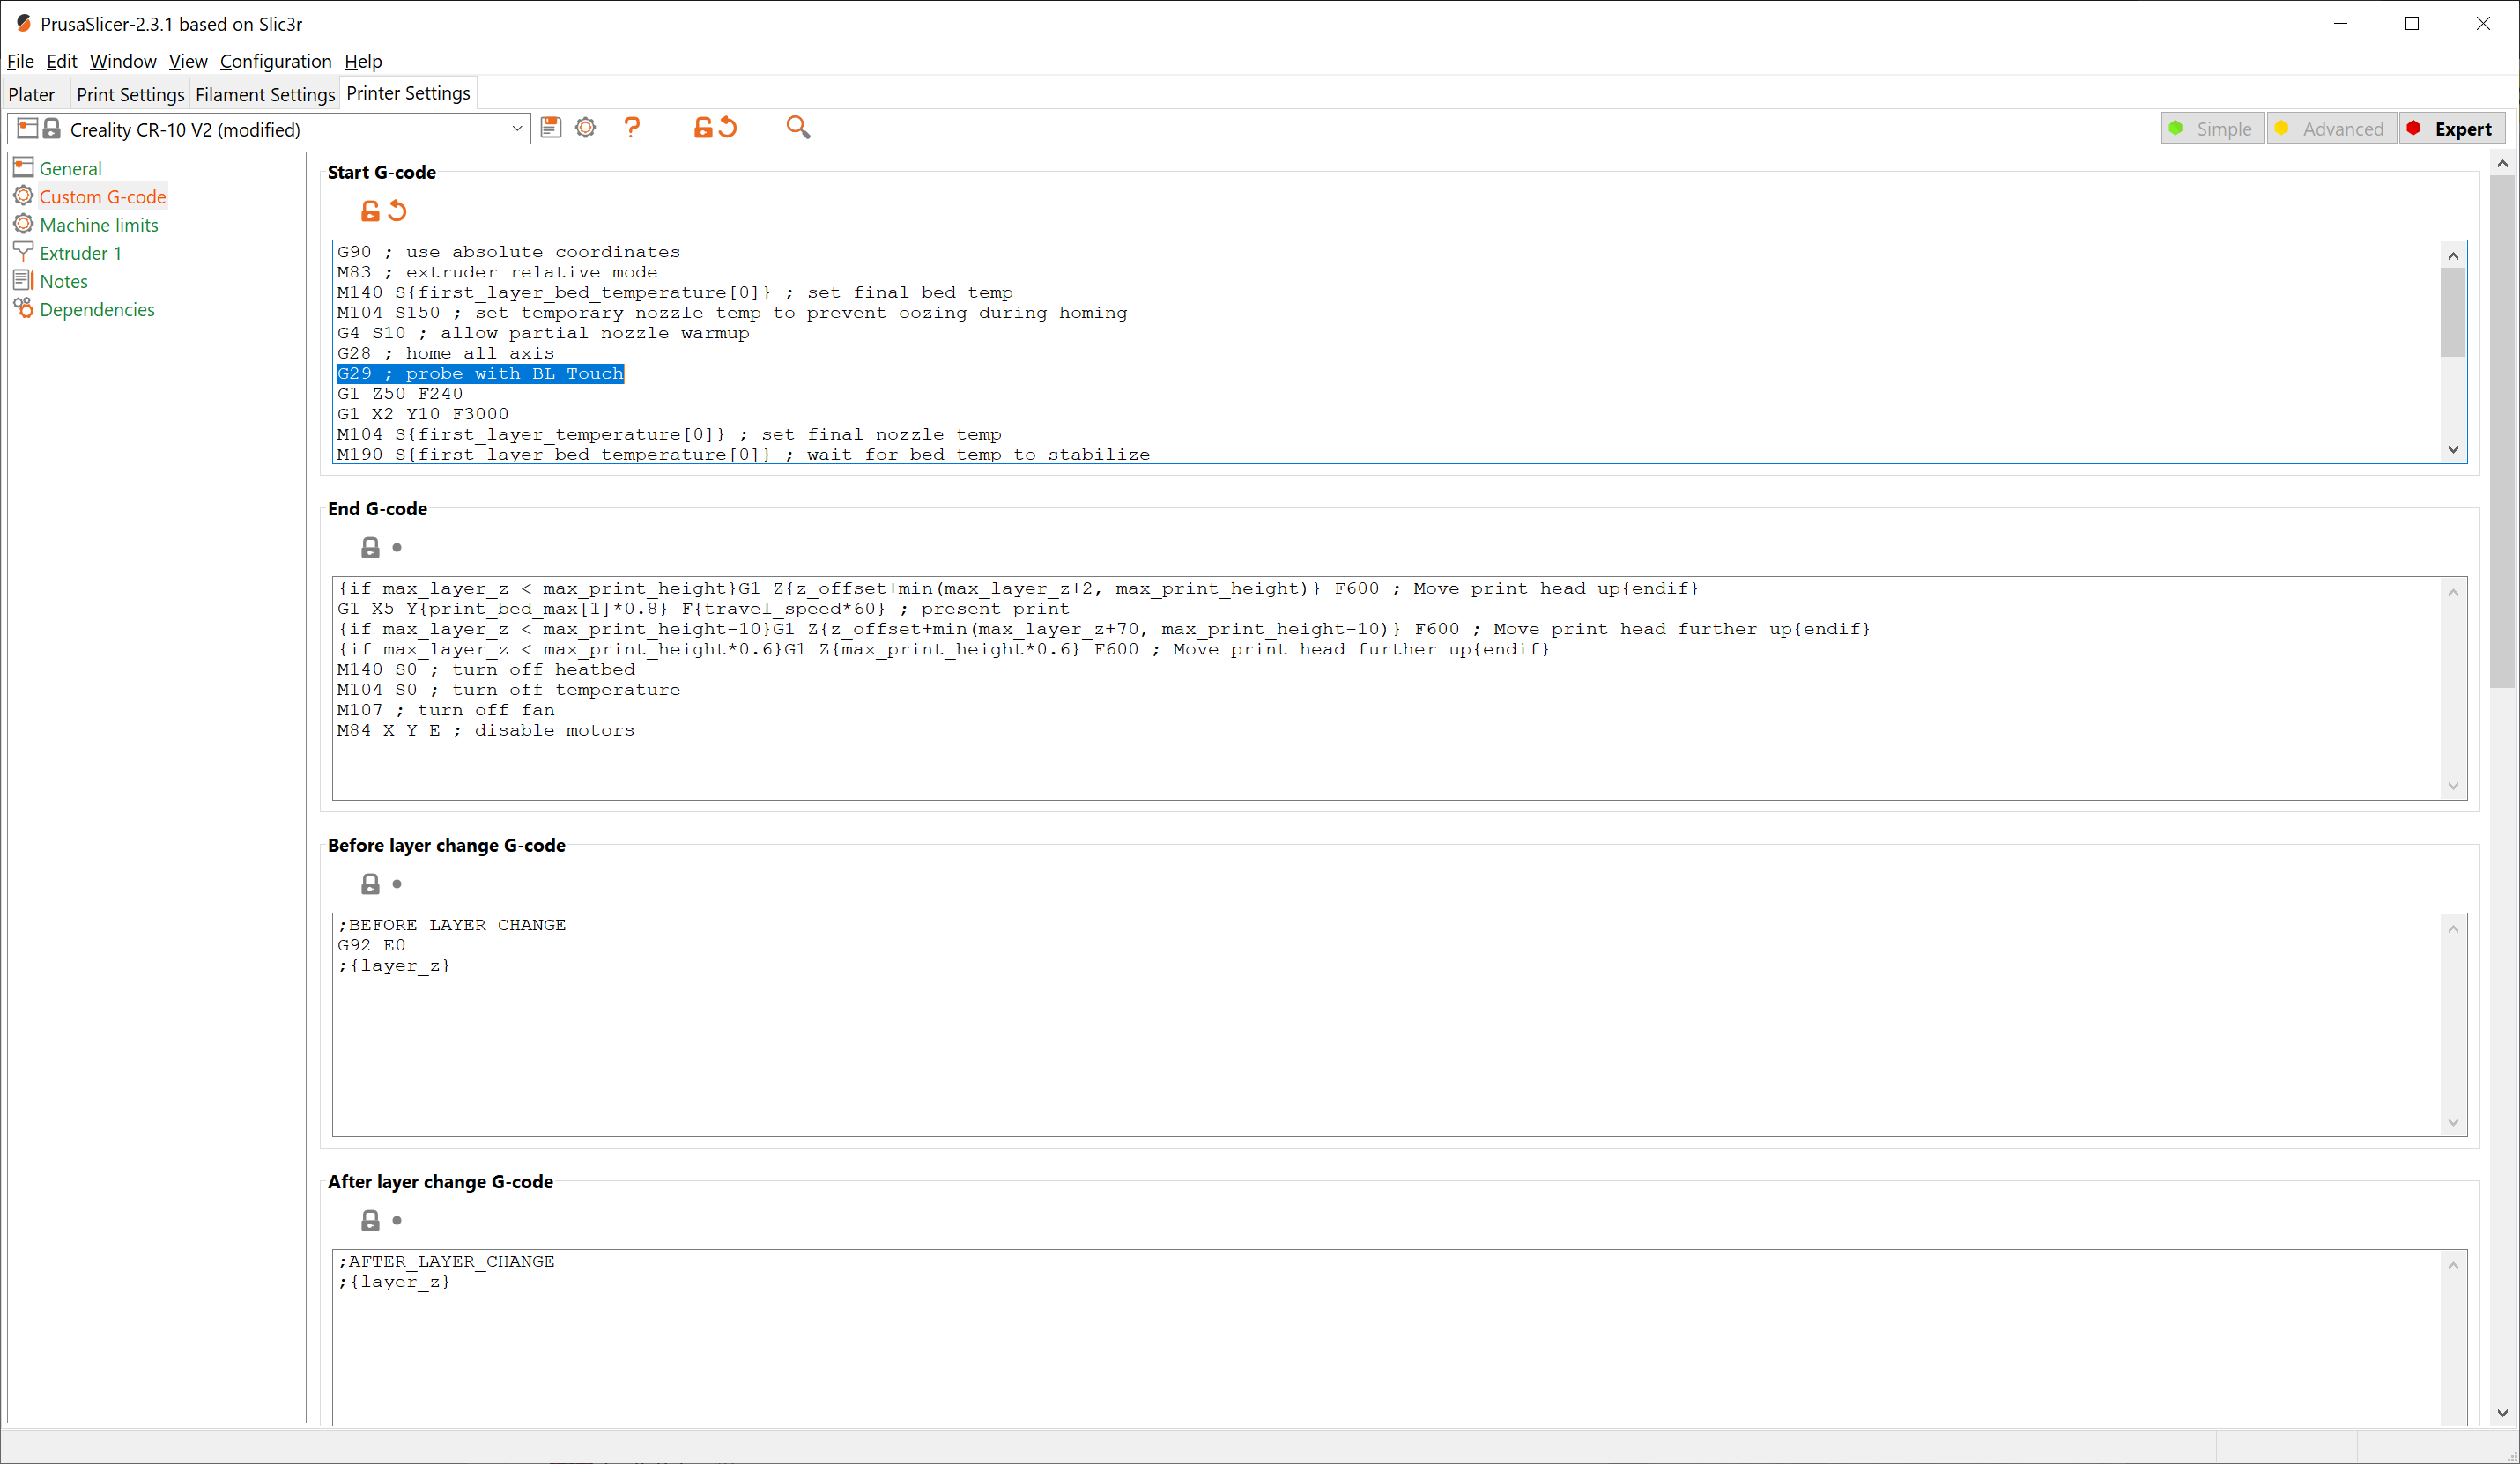
Once you are in the slicer navigate to the Printer Settings tab. You must switch the slicer into Expert mode using the red button in the top right. Find the Creality CR-10 V2 profile, open the Custom G-code section on the left, and look at the Start G-code section. We will add the line:
G29 ; Probe with BL Touch
under the line
G28 ; home all axis.
The text box should have the following content:
G90 ; use absolute coordinates
M83 ; extruder relative mode
M140 S{first_layer_bed_temperature[0]} ; set final bed temp
M104 S150 ; set temporary nozzle temp to prevent oozing during homing
G4 S10 ; allow partial nozzle warmup
G28 ; home all axis
G29 ; Probe Bed Level with BL Touch
G1 Z50 F240
G1 X2 Y10 F3000
M104 S{first_layer_temperature[0]} ; set final nozzle temp
M190 S{first_layer_bed_temperature[0]} ; wait for bed temp to stabilize
M109 S{first_layer_temperature[0]} ; wait for nozzle temp to stabilize
G1 Z0.28 F240
G92 E0
G1 Y140 E10 F1500 ; prime the nozzle
G1 X2.3 F5000
G92 E0
G1 Y10 E10 F1200 ; prime the nozzle
G92 E0
Once this is done, click the floppy disk icon to save and name the new profile Creality CR-10 V2 BL-Touch. This is the profile you will use when slicing for the CR-10 V2 in our space.
Repeat all of the steps above for the
Creality Ender-3 Maxprofile, enabling its use of the BL-Touch.
When finished you should have a profile named Creality Ender-3 Max BL-Touch with the following starting G-Code.
G90 ; use absolute coordinates
M83 ; extruder relative mode
M140 S{first_layer_bed_temperature[0]} ; set final bed temp
M104 S150 ; set temporary nozzle temp to prevent oozing during homing
G4 S10 ; allow partial nozzle warmup
G28 ; home all axis
G29 ; autolevel
G1 Z50 F240
G1 X2 Y10 F3000
M104 S{first_layer_temperature[0]} ; set final nozzle temp
M190 S{first_layer_bed_temperature[0]} ; wait for bed temp to stabilize
M109 S{first_layer_temperature[0]} ; wait for nozzle temp to stabilize
G1 Z0.28 F240
G92 E0
G1 Y140 E10 F1500 ; prime the nozzle
G1 X2.3 F5000
G92 E0
G1 Y10 E10 F1200 ; prime the nozzle
G92 E0
¶ Slicing
When you are ready to begin slicing, simply open PrusaSlicer and drag in your 3D model(s).
You may want to rotate or move around your model(s) for easier printing.
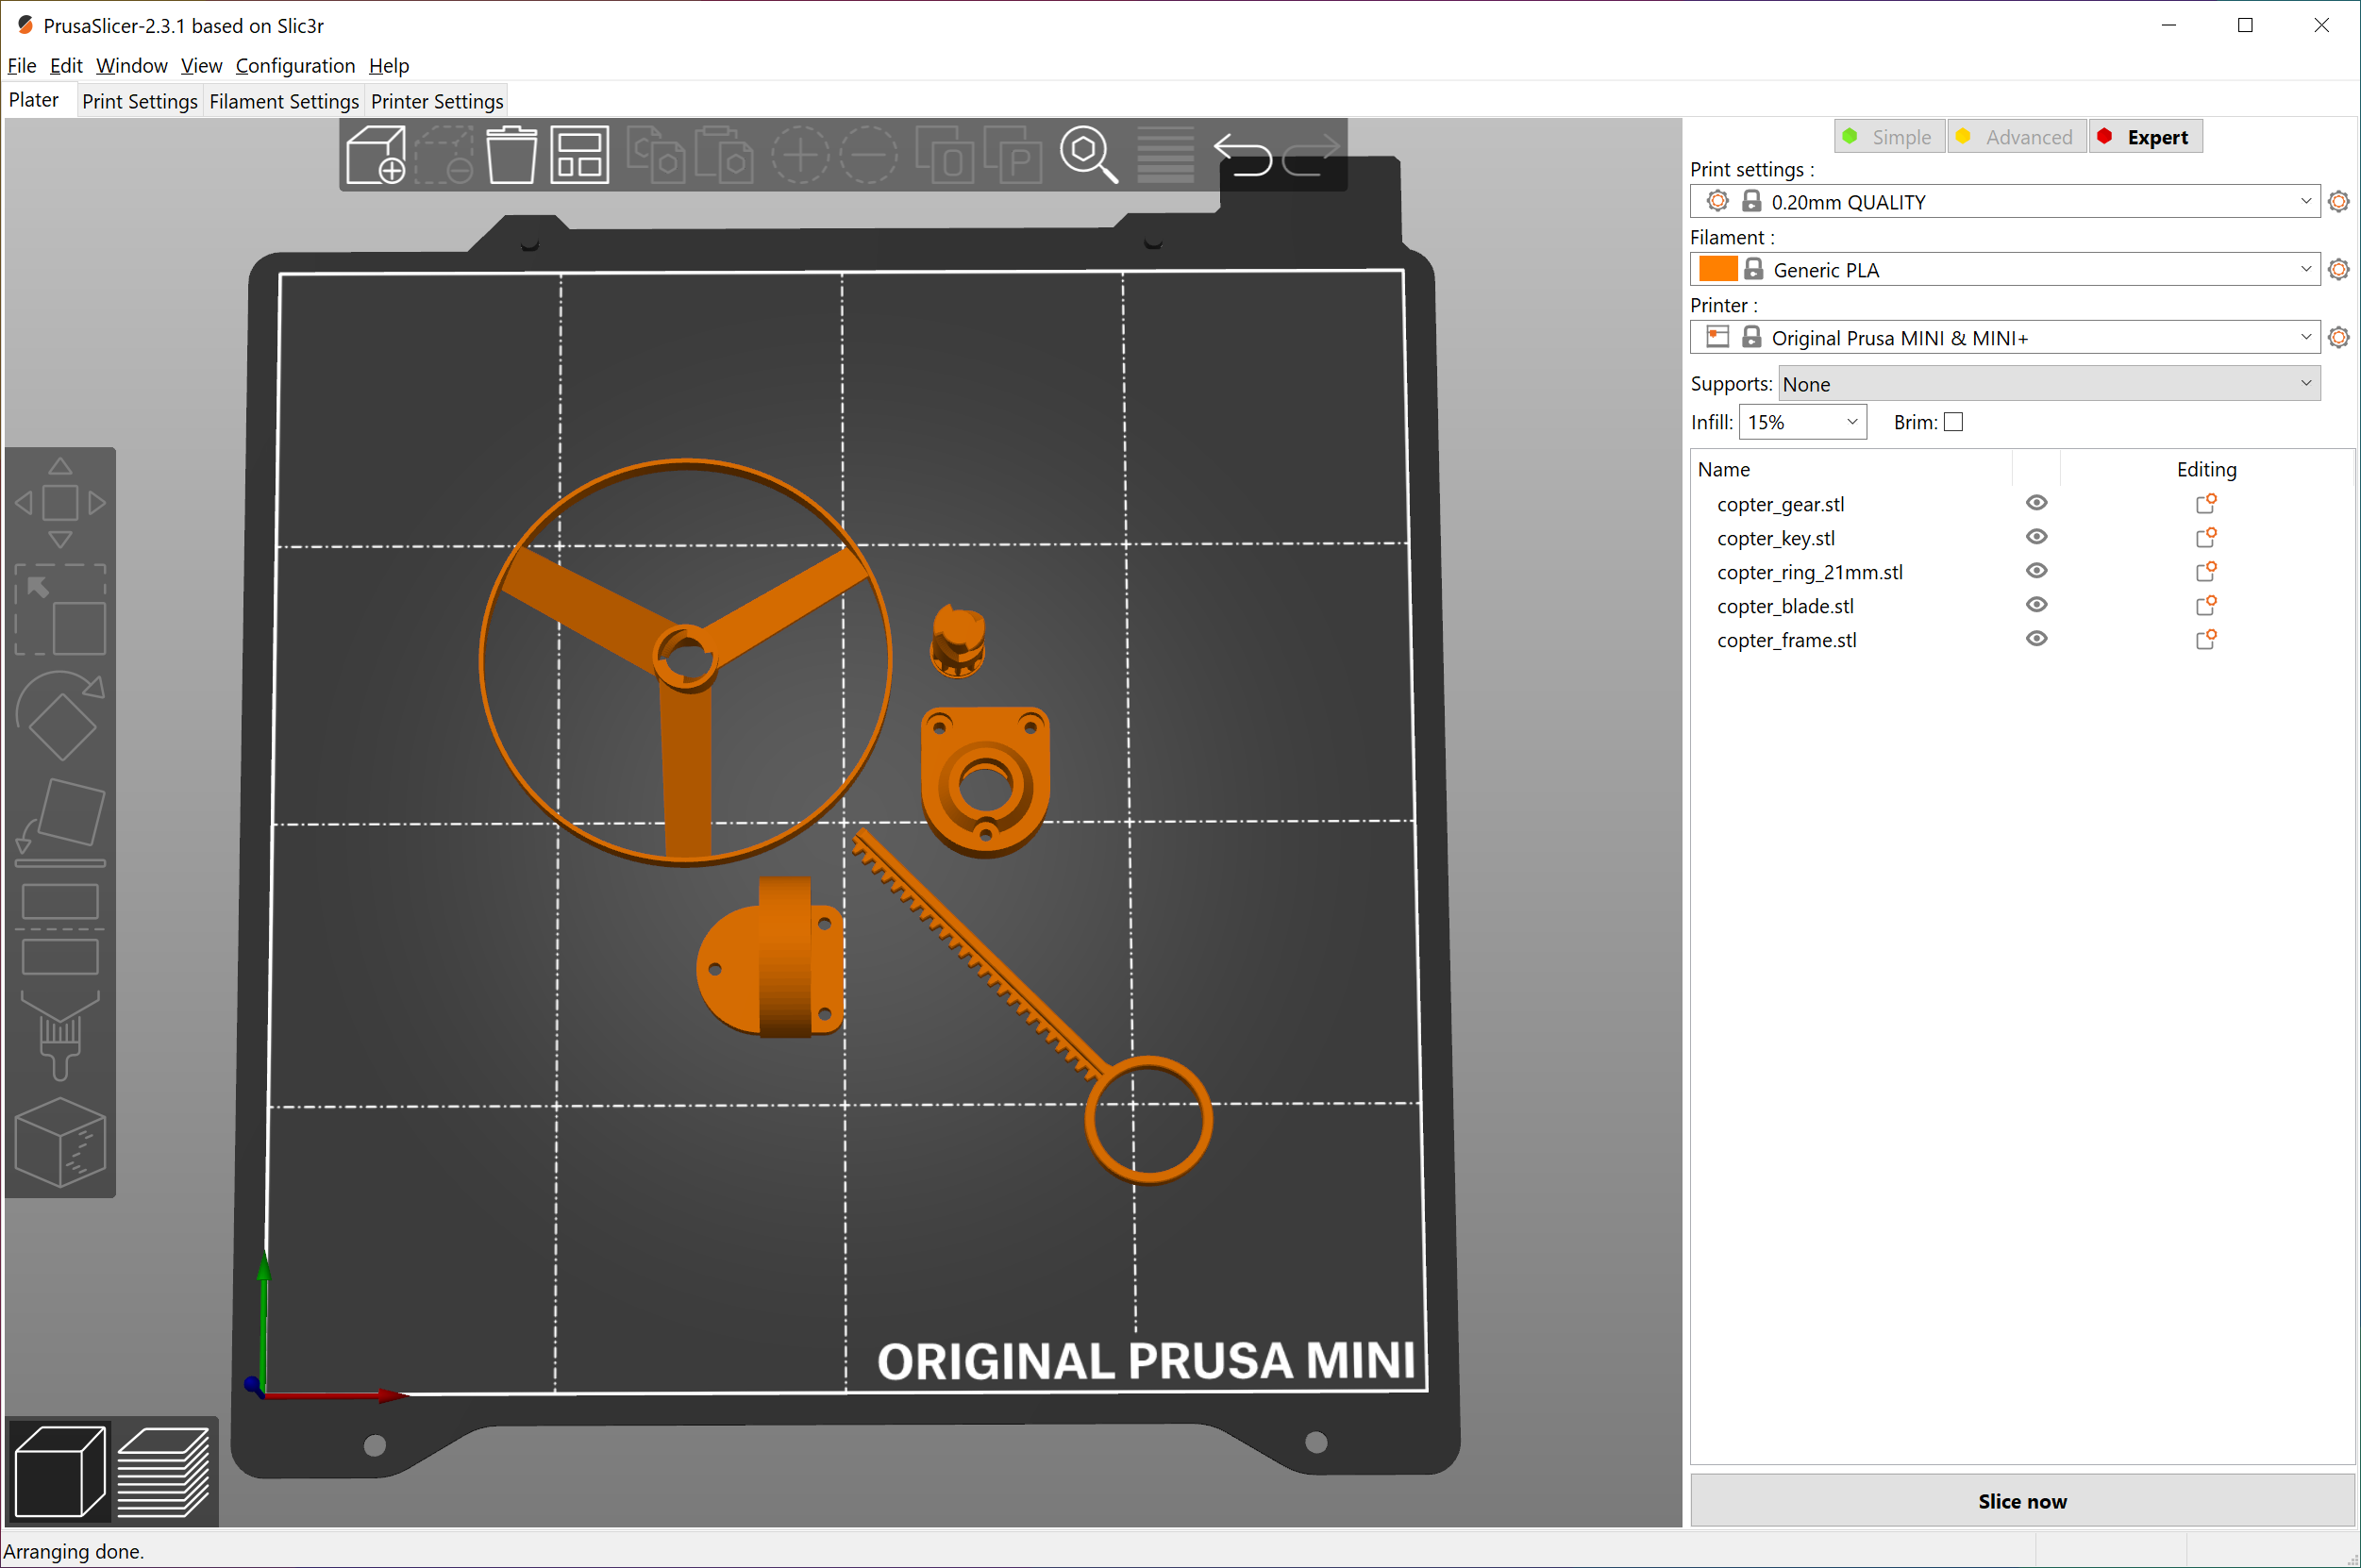
There are only five settings that you should be concerned with when printing.
¶ Print Settings
This refers to the size of layers that the printer will use to make your print. By default, the slicer comes with a number of presets ranging from .05 mm to .25 mm. The smaller the number, the higher quality of the print and the longer the print will take. This can be changed by clicking the dropdown menu located on the right-hand side of the slicer near the top.
¶ Filament
This should correspond to the type of material you plan on printing with. At the makerspace, we recommend printing with some variant of PLA. You can create your own filament profiles that better match your material's temperature and print settings. For normal PLA, the generic PLA material preset should suffice.
¶ Printer
Make sure that this matches the printer model that you are planning on printing on. Using the wrong setting here could result in print failure and damage to the printer.
¶ Supports
Some prints require supports to print correctly. Models that have significant overhangs or extend at severe angles will require them. Generally the option Everywhere will do a good job of ensuring your print is properly supported, but this process will apply supports liberally and do so in places where it isn't necessary.
¶ Infill
Infill percentage determines how much of the inside of your 3D model is filled with your material. Higher percentages will mean slightly longer print times and significantly more material used, so don't overdo it.
- For flexible prints, we recommend 5% to 10% infill.
- For prints made for display or barely any use, we recommend 15% to 20% infill.
- For prints made for light use, we recommend 20% to 40% infill.
- For prints made for heavy use, we recommend 40% or above infill.